In the final part of my series, I am going to be creating the Power BI DirectLake dataset and report from my tables that I had previously loaded into the lakehouse.
In this series I am going to show you all the steps I did to have the successful outcome I had with my client where I created the dataset (measures and fields) and the Power BI report.
Part 1 – Enabling Log Analytics, generating the KQL queries.
Part 2 – Storing the Log Analytics Queries in Azure Blob Storage.
Part 3 – Using Microsoft Fabric Dataflow Gen2 to store the data in the Lakehouse.
Part 4 – Creating a Power BI dataset and report using DirectLake. (This blog post)
Creating the DirectLake dataset
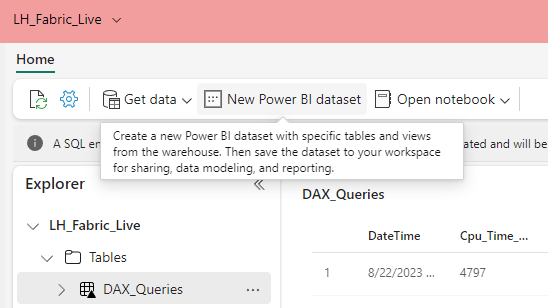
To create the dataset, I first had to go to my lake house where I have the tables created.
NOTE: This will create the dataset using the DirectLake mode which allows me to not have to import the data into the dataset.

I then clicked on “New Power BI dataset”, this brings up the New dataset window.
I then selected my table called “DAX_Queries”, then clicked on Confirm.

It then opened the dataset view as shown below.

The first thing I did was to rename my dataset, by clicking on “LH_Fabric_Live (1)” and renamed it to “DS – DAX Queries”

Next, I wanted to rename my columns to column names that are easy to read. To do this for example I right clicked on the column called “Dataset_Mode” and selected Rename.

I then renamed the column to “Dataset Mode”.
As shown below this is what my columns looked like after renaming the column names.

The last thing to create in my dataset is the measures. To do this I clicked on “New measure”.

I created the following measures:
Duration (Secs) = DIVIDE(SUM(DAX_Queries[Duration_Ms]),1000)
Avg Duration (Secs) =
VAR
TotalRows = COUNTROWS(‘DAX_Queries’)
VAR
AvgDurationSecs = DIVIDE([Duration (Secs)],TotalRows)
RETURN
AvgDurationSecs
I then changed the formatting of the measures to a decimal data type with 2 decimal points and with the thousands separator.

If I went back to the app workspace I could then see my dataset.

Creating the report
The final step after all this work is to create the report.
I had 2 options one is for me to create the report I want or to let the Fabric Service “Auto-create a report” for me.
I clicked on “Auto-create report”.

After a few seconds this is the report the Fabric service created.

Then when I try and navigate away it asks me for a report name.

I then clicked on Save.
I now have my report created which is using the DirectLake mode.
Summary
In this blog post I have shown how I created the DirectLake dataset, next I changed the column names and created some measures. Finally, I then auto created the Power BI report.
I hope that you have found this series useful and if you have got any questions, please let me know.
Once again thanks for reading my blog post!

Be the first to comment