

Welcome back to this week’s edition of the Power BI blog series.
This week, we take a look at Field Parameters, a new feature recently added to
Power BI. We start by creating a new
Field Parameter.
Until recently, allowing users to dynamically change the dimensions
and scales on charts in Power BI reports required some serious DAX knowledge. However, since the arrival of
Field Parameters, there is a function specifically designed for this purpose. Users may dynamically adjust the measures or columns
being analysed in a report by using Field Parameters. Even better, Field Parameters are easy to set
up. We just choose the measures or columns
the readers would want to change, and this feature can assist report readers to
explore and personalise the report output.
First things first: before we can use this powerful yet simple
feature, we need to check we have enabled it.
To make sure we have access to this functionality, we must ensure that
the Power BI Desktop app is up to date.
If the app was installed from the Microsoft Store, it will be updated
automatically. If the app has been
installed from www.powerbi.com, then it’s
necessary to check that any updates have been applied.
To use the preview features on Power BI Desktop, we navigate
to File -> Options & settings -> Options > Preview features. The box next to ‘Field parameters’ should be
checked to enable this feature.

If we are enabling Field Parameters, we check it, then click
OK and restart Power BI Desktop as prompted.
Now we have enabled the functionality, we can create our first Field
Parameter. In the Modelling tab, we
select New parameter > Fields.

In our example, our variable will adjust measures, so we
select ‘Fields’ from the dropdown. A
dialog appears:
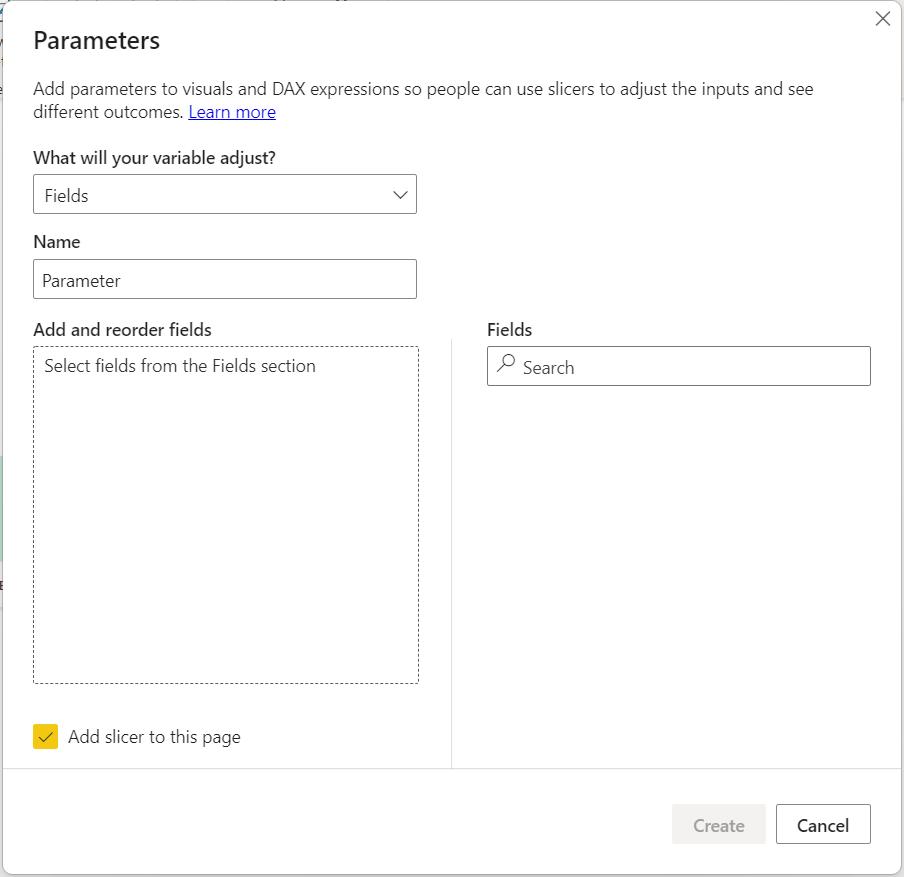
At this point we can ‘Learn more’ from the Microsoft help
pages if we wish. We also have access to
the previous dropdown, where we can change from ‘Fields’ to ‘Numeric
range’. We are going to use Fields, and
we name the parameter ‘Choices’. The
next step is to choose the fields we need to build the parameter. In our example, we’ve chosen ‘Total Amount’,
‘Total Sales’, and ‘% Var’.
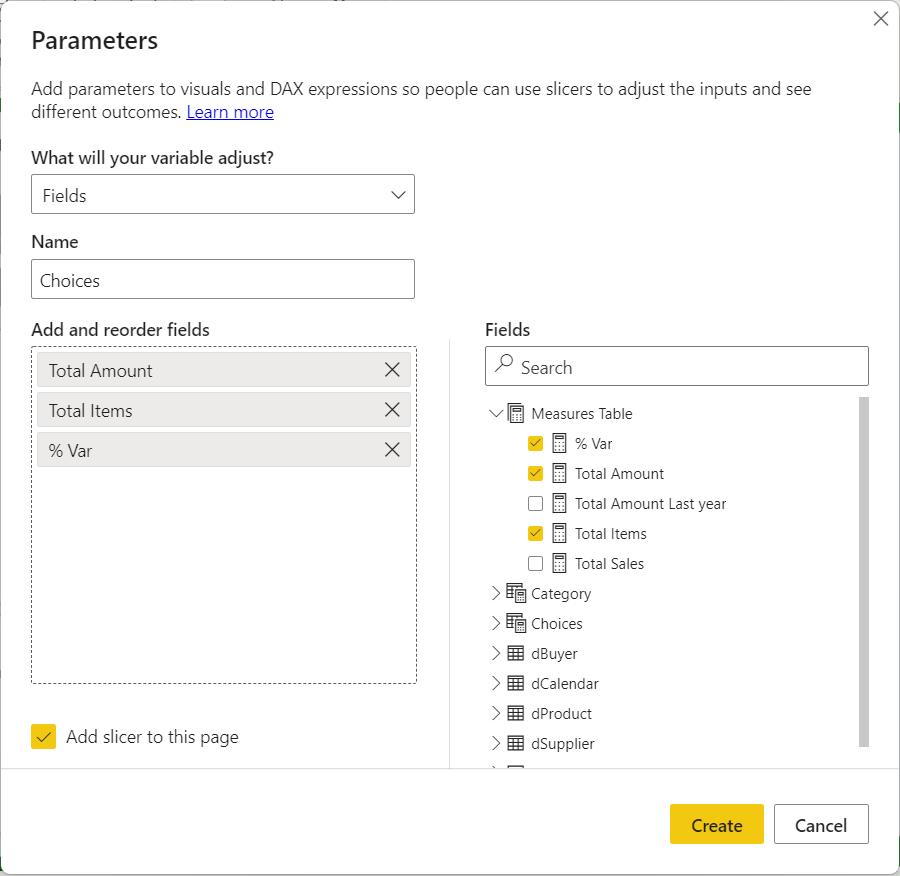
To select the fields, we click on a measure or column in the
Fields section. The fields appear in the
‘Add and reorder fields’ section in the order selected. The display name of any of the fields in the
‘Add and reorder fields’ section can be changed by double-clicking on the
field:
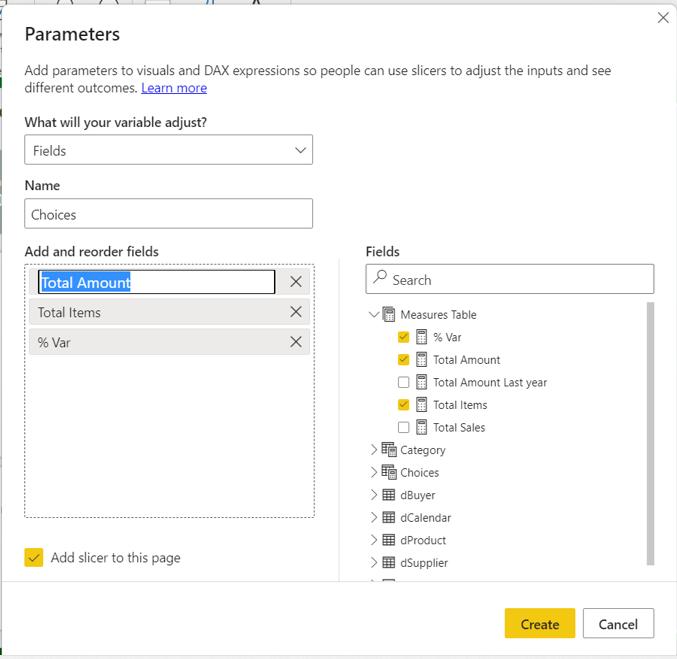
It is also possible to reorder the fields by clicking and
dragging them in the ‘Add and reorder fields’ section. To delete a field from this section, we can
use the ‘X’ icon next to the field name, or uncheck the field in the Fields
section.
If the ‘Add slicer to this page’ option is selected, we will
create a slicer on the page as soon as we click on the Create button.

We have created our first
slicer using a Field Parameter! Next
time, we will look at how to edit existing Field Parameters.
Check back next week for more Power BI tips and tricks!
Be the first to comment