

Have you ever had a situation where you have a slicer selection that “sticks”? You make a selection in a slicer, then make some changes somewhere else, but the first selection you made “sticks” when it is no longer valid? Take a look at this animated demo below to see what I mean.

Watch the demo above a couple of times.
- I first select Accessories from the top slicer (Product Category).
- The top slicer immediately filters the second slicer so you can only see SubCategories that are “Accessories”.
- I then select “Bottles and Cages” from the SubCategories slicer. So far, so good.
- Then I go back to the Category slicer and switch the Category to Bikes.
- Note that “Bottles and Cages” is still selected in the SubCategory slicer, even though there is no SubCategory “Bottles and Cages” that belongs under the Bikes Category.
If you take a look at the matrix to the right in the demo above, you will notice that when Product[Category] = “Bikes” and Product[SubCategory] = “Bottles and Cages” are both selected, the matrix returns blank. This happens because this is not a valid combination of Category and SubCategory in the Products table. If this happens in real life, it can be very confusing for the user to work out why they can’t see any data, indeed for them to know that they must deselect the invalid SubCategory item.
By default, the value selected in the second slicer does not automatically clear when the value is no longer valid based on changes to the first slicer. We can argue if that is good or bad behaviour, but that won’t change the fact that this is how it works (or doesn’t work, depending on your view).
Time to Phone a Friend
I recently got stuck with a very similar issue when developing some reporting for a client. I was aware of the problem and I knew there was no solution but I decided to ask my community of Power BI Professionals and friends just in case someone knew of a solution. To my shock and surprise, my friend Owen Auger provided me with a working solution. I looked over Owen’s solution carefully and I could not work out what he had done nor how he had done it </scratches head>. All I knew was that it “worked”. I asked Owen for help. We jumped on a call and Owen took me through the solution. I couldn’t believe the thought process that had gone into dreaming up the solution let alone the actual solution. I loved the idea so much that I decided to share it with everyone in this article (with Owen’s permission to do so, of course).
How to Stop a Slicer Selection “Sticking” When you Change Another Slicer
The solution contains a number of steps. All are required for it to work. In short, you need to:
- Create 2 new tables
- a helper table for the values in the top slicer
- a helper table for the values in the bottom slicer (the one with the sticky selection)
- Join the new tables into the model
- Replace the columns in your slicers
For the rest of this article, I will take you through the steps to complete the task. You can download the sample workbook (a modified version of Adventure Works) here.
Create a Helper Table for the Sub Menu Slicer
It is necessary to create the sub menu table first. The reason for this will become clear shortly. I created this helper table using Power Query. The steps are not hard, so I have just described what I did.
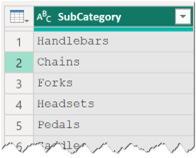
First, I created a new, single column table containing all the unique SubCategory values (I just referenced the products table and removed duplicates).
I then duplicated this column 3 times.
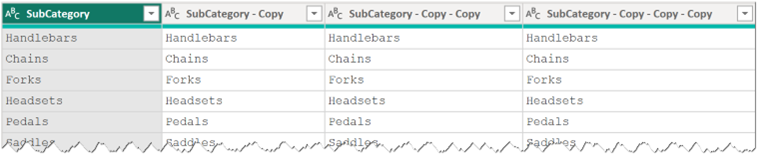
Then I renamed the columns. One column name for every Product Category. Again, you will see why shortly.
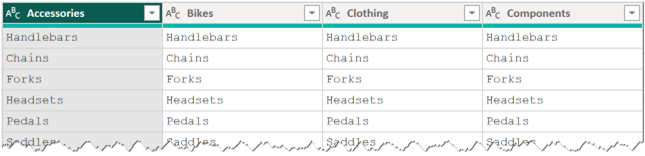
I called this table SubMenuHelper and loaded it into the semantic model.
Create a Helper Table for the Top Menu Slicer
This next table is where the secret sauce is created. This table is created using a Fields Parameter.
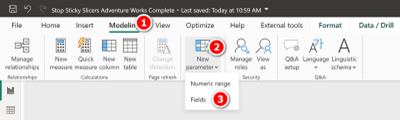
I went to Modeling, New Parameter, Fields to create a new Fields Parameter.
I called the new parameter “TopMenuHelper”, then added the 4 columns from the SubMenuHelper table into the Fields Parameter as shown below. I turned off “Add slicer to page” because I am going to use the slicer I already have set up.
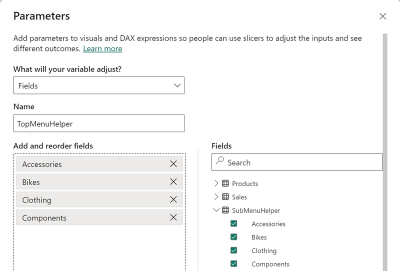
As you can see above, the reason I renamed the 4 columns in the first helper table to be the names of the Product Categories is because these are the 4 columns that are placed in the Field Parameter.
This is what the TopMenuHelper table looks like in the data view.
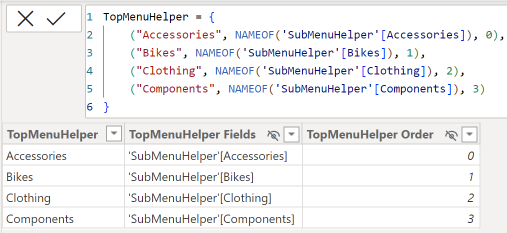
Note the first column is the list of values that will finish up in the top slicer on my report.
I then made 2 changes. I will explain why I did the second one shortly.
- I renamed the TopMenuHelper column to be “Category”
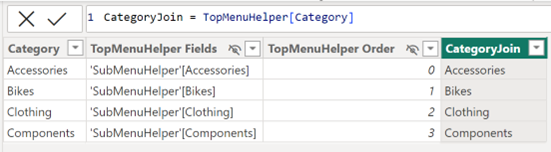
- I duplicated the new Category Column using a DAX Calculated Column and called it CategoryJoin.
This is what I then had for the second table “TopMenuHelper”.
Join the New Tables into the Model
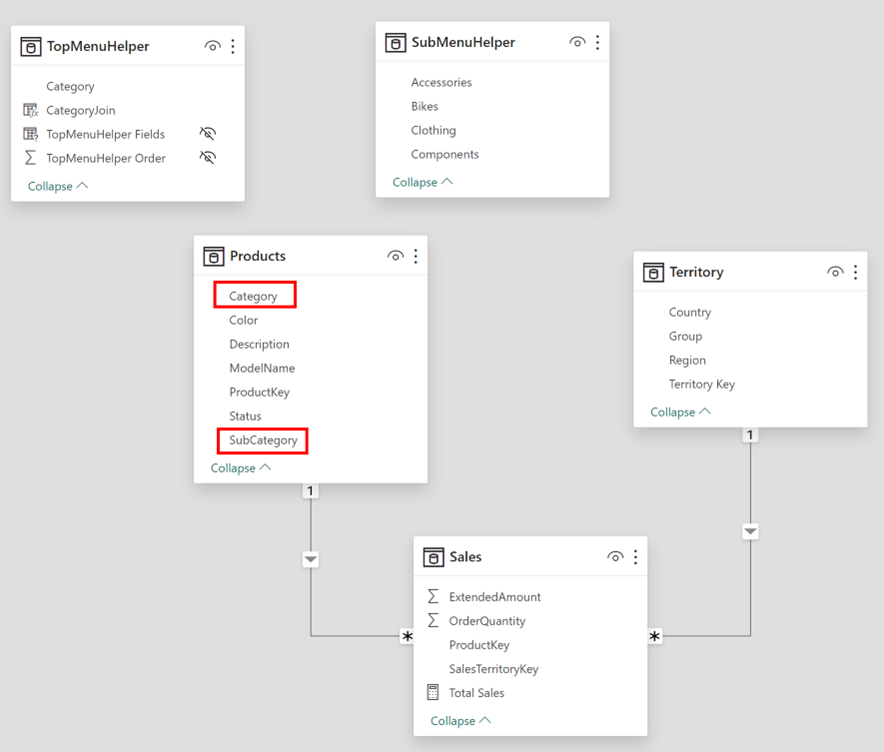
At this point, my model looked like this (see below). The 2 slicers in my report are still connected to the Product[Category] and Product[SubCategory] columns as highlighted below at this time.
Now it’s time to join TopMenuHelper to the Products table. If you try this yourself by trying to join the 2 category columns from both tables, you will get an error.
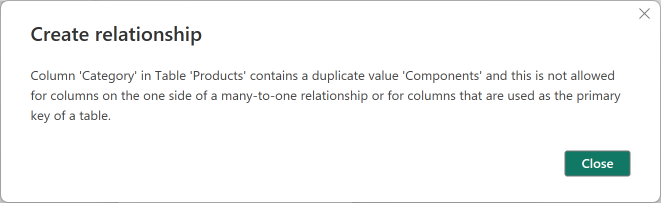
You are not allowed to create a relationship between this first column in a Field Parameter table and another table. This is why I duplicated this Category column using a DAX calculated column. You ARE allowed to join the field parameters table using a duplicate column, just not the main column. I therefore joined Products[Category] to TopMenuHelper[CategoryJoin] column.
The next thing I did was I joined the Products[SubCategory] column to ANY COLUMN in the SubMenuHelper table. Remember, all 4 of these columns are identical. They all contain the superset of all SubCategories; it therefore doesn’t matter which column it used in the join as they will all behave the same way. Also note in the image below that this relationship is bi-directional.
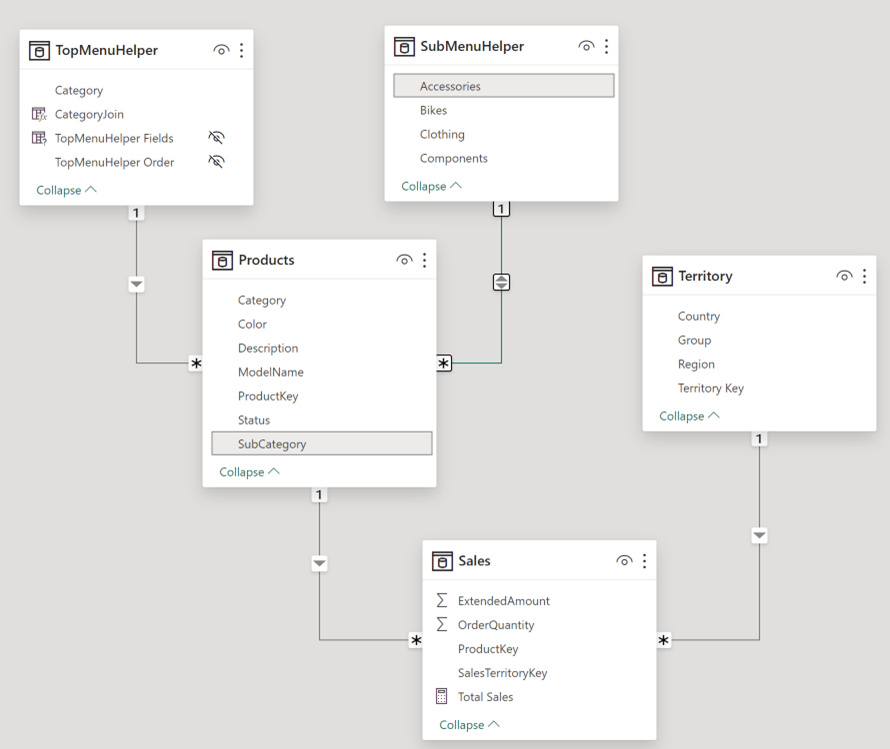
Before moving on, look at the model and understand how filter propagation will work.
- First a slicer puts a filter on TopMenuHelper (by selecting one Category)
- The products table is then filtered for just that Category
- The products table filters the SubMenuHelper table (bi-directional crossfiltering) so it only contains the SubCategories for that one product Category. There are still 4 identical columns in this SubMenuHelper table and they all contain just the SubCategories for that selected product Category selected in 1 above.
It should be clear that these 2 tables have the ability to complete the filtering behaviour needed.
Replace the Columns in Your Slicers
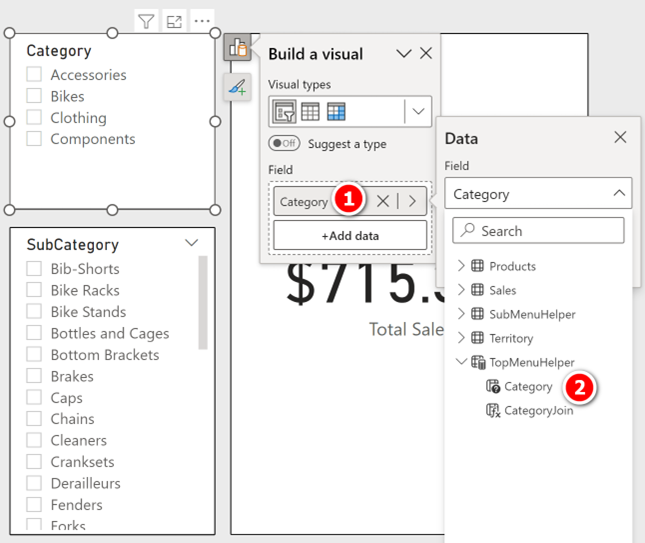
The next step is to replace the values in the slicers. In the top slicer I replaced Products[Category] (#1 below) with TopMenuHelper[Category] (#2 below)
I did exactly the same for the second slicer above. Take a look below. Whatever you do, do not use the table SubMenuHelper here. This second slicer must be configured the same as the first one.

The next thing I did was set the top slicer so it is single select (see #1 below). This solution only works when there is a single value selected in the top slicer, so it is easier and cleaner to set the top slicer to single select.

Finally, I went into the build menu in the bottom slicer (#2 above), right clicked on Category (#3 above) and selected “Show values of selected field” (#4 above). This ‘hidden’ toggle option allows you to toggle so that the field parameter shows either the list of values in the field parameter or the resulting underlying column that is referenced by the the field parameter (in this case). It is the field parameter that is indirectly adding a column from the SubMenuHelper table into this slicer.
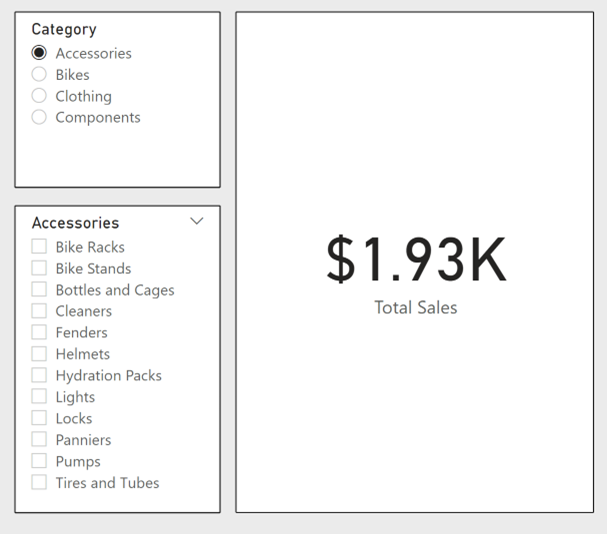
And this is what it looks like.
Why does it Work?
Why does it work I hear you say. Here is an explanation.
- The top slicer references a column in a field parameter table.
-
This field parameter table is doing 2 things
- It is switching the field parameter selection between the 4 different columns in the SubMenuHelper table.
- It is also directly filtering the Products table. The Products table is then filtering the SubMenuHelper table due to bi-directional filtering.
- The second slicer shows a list of values based on the selection from the top slicer. It does this because I changed the field parameter behaviour to “show values of selected field” rather than to show the selected field, itself.
- Because of step 2a above, the column is being switched. It is this switching of columns that “forces” the sticky selection to be released. It cannot retain the selection because the selection technically no longer exists. The slicer therefore has no choice but to release that sticky selection.
What do you think?
I hope all of that made sense. There are quite a lot of moving parts in this solution and I have to admit that the second time I tried to deploy the solution I had completely forgotten how to do it. This is one of the reasons I like writing articles like this as it will give me something to come back to later, next time I need to deploy the solution. If you know of any other ways to solve this problem, please leave a message in the comments below.
Edit: 5th Dec 2023. Read this post for a bug update from Microsoft.
About Matt and Owen
Both Matt Allington and Owen Auger are Principal Power BI consultants working for Agile Analytics. If you need any expert help with any of your Power BI problems, please feel free to make contact with us
Be the first to comment