

One of the
key features that distinguishes Power BI from other Business Intelligence (BI)
solutions is its ability to provide row-level security (RLS), which is
protection based upon each row of a data table.
Instead of creating a report for each of the access profiles, you can
create a single report linked to different access profiles.
Last week, we looked at how to set up static RLS in
Power BI Desktop, by creating roles.
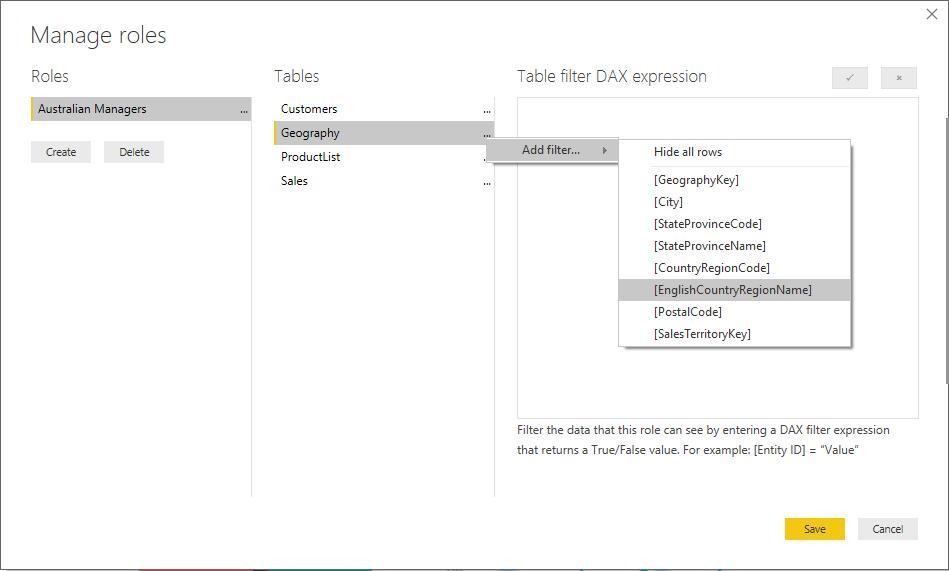
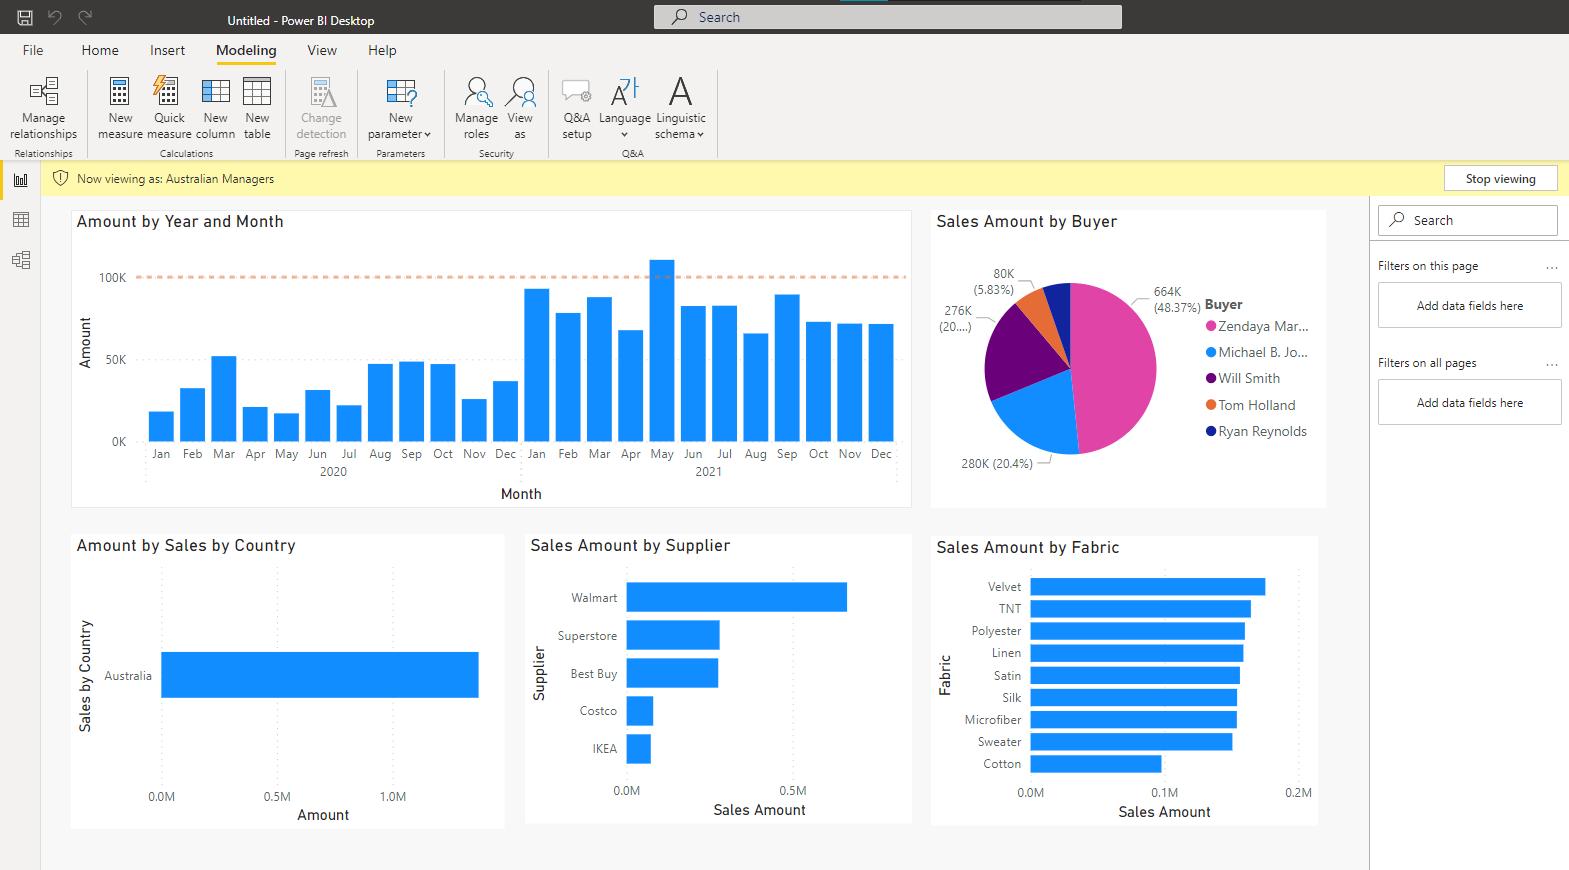
We checked the role worked as expected using
the ‘View as’ facility in the Security section of the Modeling (sic) tab.
There is no
security in the PBIX file; you can see the entire dataset. There is no way that you may have any sort of
security with Power BI Desktop files and roles may only be created or modified
inside Power BI Desktop.
This week, we
continue by looking at the impact in Power BI Service.
Manage
Your Model’s Security – Static
In Power BI
Service, members of the same workspace have access to datasets, RLS will not
restrict this data access. With our
dataset saved and published to a workspace, we can use the Power BI Service to
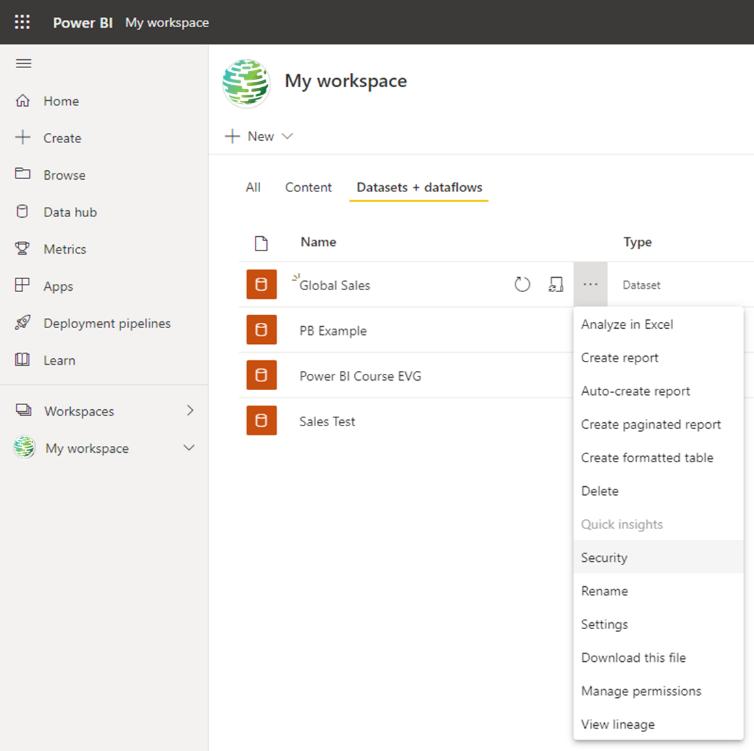
share it with the Australian managers.
Within the Power BI Service, under the workspace where you have saved
your report, go to ‘Datasets + dataflows’ and click on the ellipses (‘…’)
(if you mouse over it will display ‘More options’) and select Security.
Managing
Members
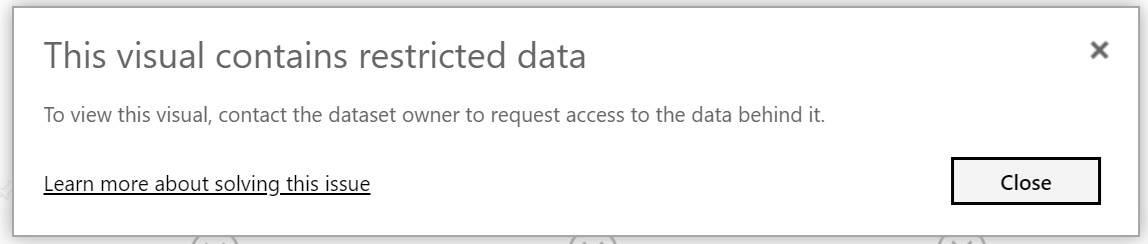
It is vital
to note that if you share your report (with row-level security applied) with any
member prior to assigning a role to them on Power BI Service, the user will be allowed
to open the report, but all visuals will display the warning ‘This Visual includes
restricted data’:

In the ‘Row-level
Security’ page you may add members to a role that you have defined in Power BI
Desktop, as well as review who is limited in this capacity.
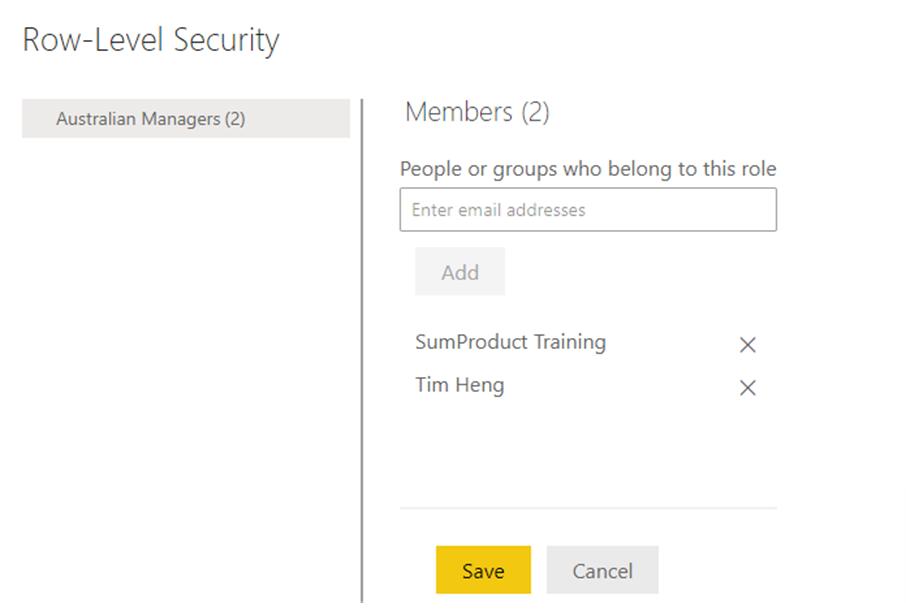
By entering
the user’s email address in the ‘People or groups who belong to this role’ box,
you may add a member to the role in the Power BI Service. If we need to remove a member, either due to
wrong registration, change of department or due to termination of contract, for
example, members can be removed by clicking the ‘X’ next to their name.
Please note
that by adding members in this manner, you are not sharing the report with them. Instead, you are assigning security, i.e. notifying
Power BI that these individuals are part of this created role.
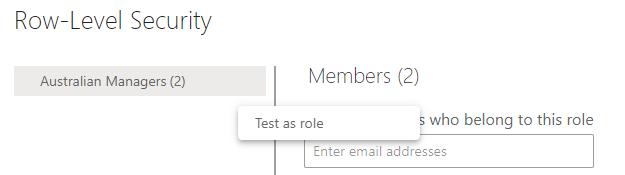
Validating Roles within the Power BI Service
In Power BI
Desktop, we checked what a role could see by using ‘View as’. You may also validate roles within Power BI
Service. This can be done by hovering
your mouse over the role and clicking in the ellipsis (‘More options’) and then
selecting ‘Test as role’.
This will
forward you to the report that was published from Power BI Desktop using this
dataset. The role that is currently
being used is displayed in the page header and the entire report will be
filtered to display only the data that the specified role may view.
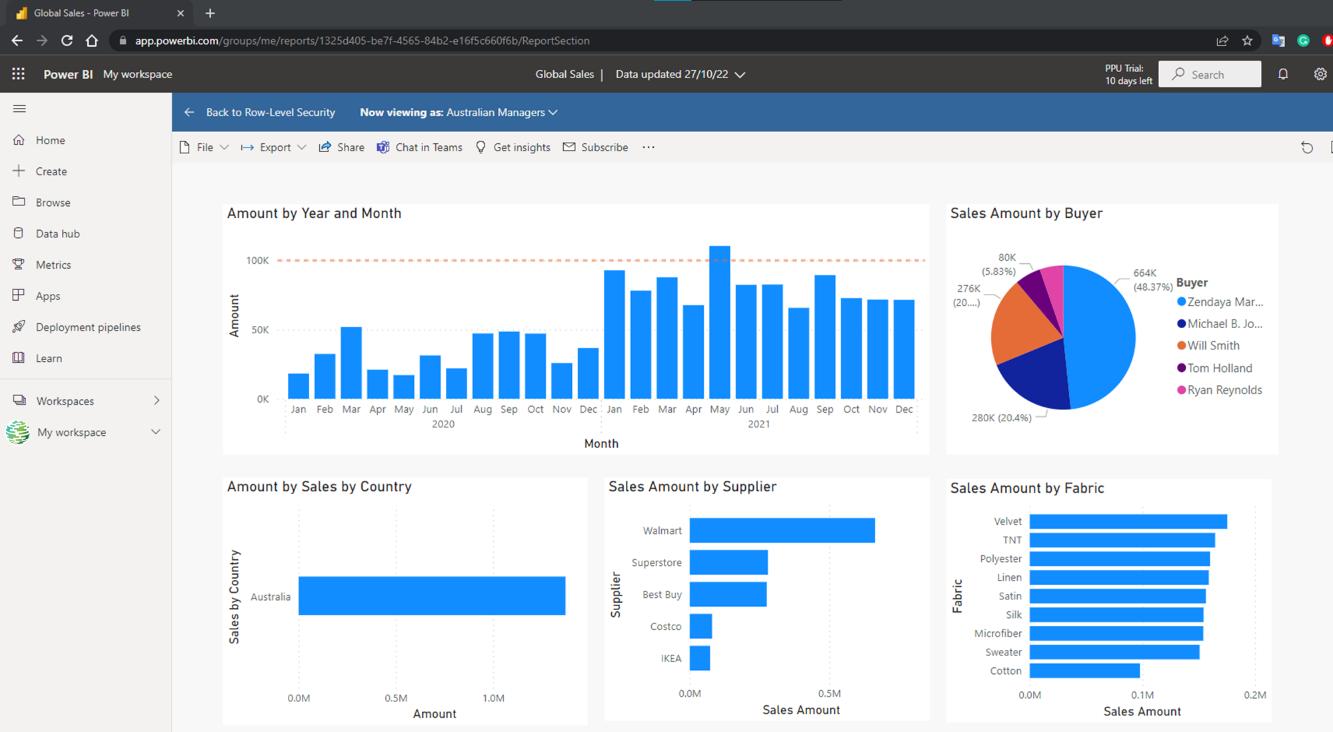
Clicking ‘Back
to Row-Level Security’ will return to our RLS settings.
Considerations and Limitations
Amongst the
concerns and constraints of using row-level security, you should note:
- you
must recreate any roles and rules that you previously created in Power BI Service
in Power BI Desktop - RLS
may only be applied to datasets created using Power BI Desktop. If you wish to enable RLS for Excel datasets,
you must first convert them into Power BI Desktop (PBIX) files - you
will be unable to setup RLS within the Power BI Service if you use a live
connection. This is defined in the
on-premises Analysis Services model.
Next time,
we will move on to setting up and using dynamic RLS.
Check back next week for more Power BI tips
and tricks!
Be the first to comment